

Why a New Hydraulic Pump Fails: 10 Critical Causes
nstalling a new hydraulic pump should restore machine performance—not create another expensive failure a few hours or days later.
Yet hydraulic repair shops regularly encounter the same situation:
The old pump failed, a new pump was installed, the machine worked briefly, and then the replacement pump became noisy, weak, overheated, or failed again.
When a new hydraulic pump fails after installation, the pump itself is not always the original cause.
Contamination left in the hydraulic system, incorrect pump identification, dry startup, restricted inlet flow, excessive case pressure, incorrect regulator settings, coupling problems, overheating, or an unresolved failure elsewhere in the machine can quickly damage a replacement pump.
Before replacing another pump, identify why the first replacement failed.
If you are still diagnosing whether the original pump was actually defective, first review FarinParts’ guide to the 10 signs of a failing excavator hydraulic pump. The guide explains why symptoms such as low pressure, overheating, noise, and slow operation do not automatically prove pump failure.
Quick Answer: Why Does a New Hydraulic Pump Fail?
The most common causes include:
| Cause | What Happens |
|---|---|
| Contaminated hydraulic system | Metal and debris damage the new rotating group |
| Pump not primed | Internal parts run without adequate lubrication |
| Restricted suction | Pump cavitates and receives insufficient oil |
| Air entering inlet line | Aeration causes unstable lubrication and damage |
| Blocked case-drain line | Housing pressure rises and damages seals/components |
| Incorrect hydraulic oil | Lubrication and internal leakage become abnormal |
| Wrong pump configuration | Regulator, shaft, ports, or displacement do not match |
| Incorrect pressure settings | Pump operates beyond intended load |
| Coupling or alignment problem | Shaft and bearings receive abnormal loads |
| Original system fault remains | New pump is damaged by the same condition as the old one |
A replacement pump should therefore never be treated as a simple “remove one, install another” repair.
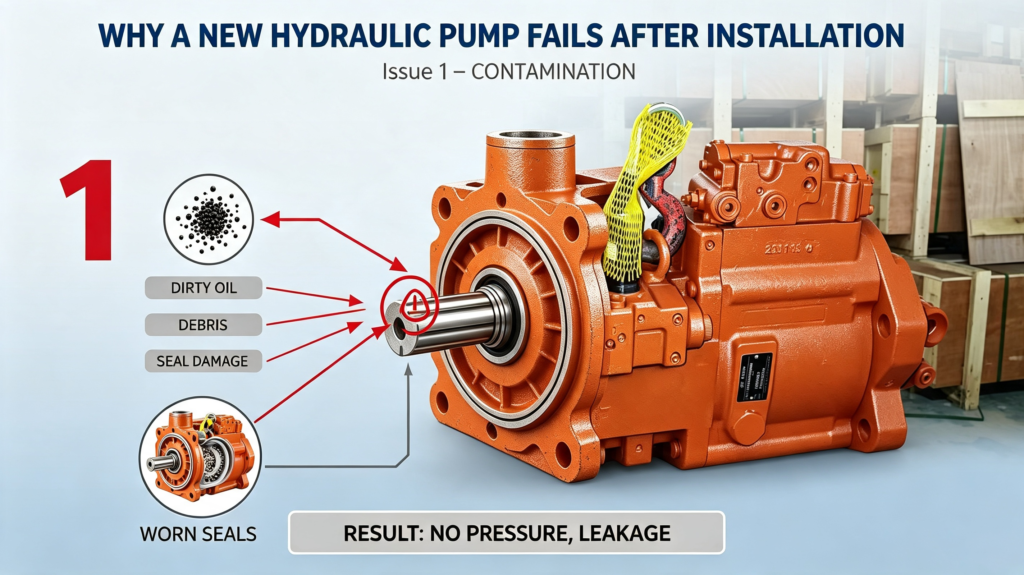
The Hydraulic System Was Not Cleaned After the Old Pump Failed
This is one of the most serious causes of repeat hydraulic pump failure.
When a piston pump suffers internal damage, wear particles may come from:
- Cylinder block
- Valve plate
- Piston shoes
- Swash plate
- Bearings
- Retainer plate
- Drive shaft
- Pump housing
Those particles do not necessarily remain inside the old pump.
They may circulate into:
- Hydraulic tank
- Main control valve
- Oil cooler
- Return lines
- Hoses
- Cylinders
- Swing motor
- Travel motors
- Center joint
- Filters and strainers
FarinParts’ existing pump-failure guide specifically warns that metal contamination can travel throughout the hydraulic system and that a replacement pump should not be installed until the contamination source has been identified.
What happens to the replacement pump?
The new pump begins operating with clean, precisely fitted internal surfaces.
Contaminated oil can immediately scratch or damage:
- Valve plate surfaces
- Cylinder block face
- Piston shoes
- Bearings
- Servo components
- Regulator spools
A brand-new pump can therefore become damaged very quickly even though there was nothing wrong with it when installed.
Before installing the replacement pump
Depending on the type and severity of failure, inspect or clean:
- Hydraulic tank
- Suction line
- Return line
- Main hydraulic filter
- Pilot filter
- Suction strainer
- Oil cooler
- Main control valve
- Cylinders
- Swing and travel motors
- Case-drain lines
- Hydraulic hoses
Never assume that changing the oil filter alone removes all contamination.
2. The New Hydraulic Pump Was Started Dry
A hydraulic pump depends on hydraulic oil for both lubrication and cooling.
If the pump housing and inlet are not properly filled or primed before the engine starts, internal components may rotate with inadequate oil.
This can damage:
- Piston shoes
- Swash plate
- Cylinder block
- Valve plate
- Bearings
- Shaft surfaces
The risk becomes even higher if the engine is immediately accelerated after startup.
Warning signs after a dry startup
You may hear:
- High-pitched whining
- Grinding
- Rattling
- Abnormal mechanical noise
You may also notice:
- Delayed hydraulic response
- Foamy oil
- Rapid temperature increase
- Metallic debris
- Excessive case-drain flow
Better startup practice
The exact procedure depends on the machine and pump manufacturer, but the general approach is:
- Fill the pump case where specified
- Prime the suction circuit
- Confirm sufficient reservoir oil
- Verify case-drain connections
- Start at low engine speed
- Avoid immediate maximum-pressure operation
- Cycle hydraulic functions gradually
- Monitor noise, leaks, and oil level
Always follow the machine and pump service information for the specific model.
3.The Pump Is Starved for Oil at the Inlet
Even a perfectly primed pump can fail if it cannot receive enough hydraulic oil while operating.
This condition is commonly called pump starvation.
Possible causes include:
- Blocked suction strainer
- Collapsed suction hose
- Hose lining separating internally
- Suction hose too small
- Closed or partially closed valve
- Tank outlet restriction
- Clogged tank breather
- Oil viscosity too high
- Incorrect suction plumbing
When inlet pressure falls too low, cavitation can occur.
FarinParts’ hydraulic pump failure guide identifies restricted suction, blocked strainers, collapsed hoses, incorrect oil viscosity, and blocked tank breathers as common contributors to cavitation and pump noise.
Why cavitation destroys a new pump
Vapor cavities can form in the oil and then collapse as pressure changes inside the pump.
Repeated cavitation can damage precision surfaces and eventually produce:
- Surface erosion
- Pitting
- Noise
- Loss of flow
- Excessive internal leakage
- Rotating-group damage
If a replacement pump suddenly begins whining, inspect the inlet circuit before assuming that the new pump is defective.
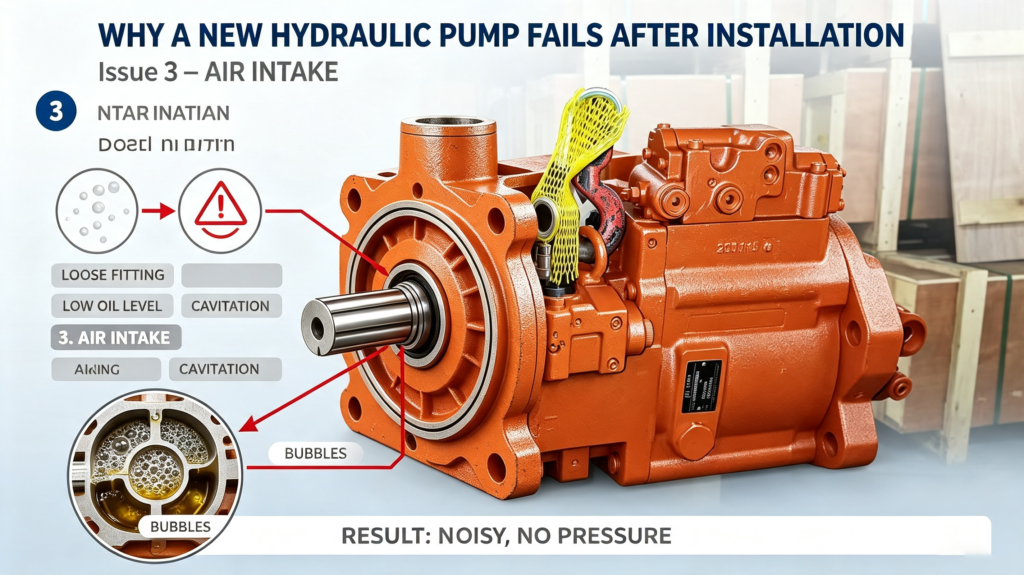
4. Air Is Entering the Suction Line
A suction leak can be particularly difficult to diagnose because the hose may not leak hydraulic oil outward.
Instead, the pump may draw air inward.
Possible leak points include:
Loose hose clamps
Cracked suction hose
Damaged O-rings
Loose flange connections
Poorly sealed fittings
Incorrect suction-hose installation
Air mixed with hydraulic oil may create:
Foamy or milky oil
Jerky hydraulic movement
Pump noise
Unstable flow
Poor lubrication
Excessive heat
If the machine becomes noisy immediately after pump replacement, inspect every suction connection.
5.The Case-Drain Line Is Restricted or Connected Incorrectly
This is an especially important issue with piston pumps and motors.
Normal internal leakage is routed through the case-drain line back to the hydraulic tank.
The line helps prevent excessive pressure from building inside the pump housing.
A problem can occur when the case drain is:
Blocked
Pinched
Bent
Connected to the wrong port
Connected to a high-pressure return circuit
Restricted by a dirty filter
Incorrectly sized
Plugged during installation and accidentally left closed
Excessive housing pressure can damage:
Shaft seals
Housing seals
Bearings
Rotating components
FarinParts’ troubleshooting guide specifically warns never to block the case-drain line because excessive case pressure can damage the shaft seal and cause external leakage.
After installation, verify:
Correct drain port
Correct hose routing
No sharp bends
No closed valves
Low return pressure
Correct tank connection
Correct drain-line size
If the new pump starts leaking around the shaft seal shortly after installation, do not simply replace the shaft seal. Check case pressure first.
6. The Replacement Pump Is Not the Correct Configuration
Two hydraulic pumps can look almost identical and still be incompatible.
Differences may include:
- Pump displacement
- Shaft spline
- Shaft diameter
- Mounting flange
- Port orientation
- Pilot pump configuration
- Regulator design
- Solenoid type
- Connector
- Control pressure
- Horsepower control
- Load-sensing control
- Rotation direction
The machine may allow the incorrect pump to physically bolt into place, but that does not mean it will operate correctly.
FarinParts recommends identifying a pump using the complete machine model, serial number, pump manufacturer, full pump model code, OEM number, regulator configuration, shaft, ports, and clear photographs—not appearance alone.
Before purchasing another pump, use the FarinParts guide to identifying the correct excavator hydraulic pump
Information to confirm
Machine brand:
Machine model:
Machine serial number:
Pump manufacturer:
Full pump model:
OEM part number:
Shaft configuration:
Regulator model:
Solenoid configuration:
Main port arrangement:
Pilot pump:
Rotation direction:
A photo of the old pump nameplate is usually much more useful than simply sending “CAT 320 pump” or “Komatsu PC200 pump.”
7. Pump Pressure or Regulator Settings Are Incorrect
Many excavator main pumps are variable-displacement piston pumps.
Their output is controlled by:
- Regulators
- Servo pistons
- Springs
- Pilot signals
- Pressure-compensator systems
- Power-control systems
- Electronic solenoids
Installing the correct mechanical pump does not guarantee that the control configuration is correct.
An incorrectly adjusted regulator can cause the pump to:
- Stay at excessive displacement
- Operate at excessive load
- Produce unstable flow
- Overload the engine
- Run unusually hot
- Fail to destroke correctly
Likewise, an incorrectly adjusted main relief valve may subject the pump to excessive pressure.
After pump installation, verify:
- Main hydraulic pressure
- Pilot pressure
- Pump control pressure
- Engine speed under load
- Pump displacement control
- Solenoid current or signal where applicable
- Relief-valve settings
Do not randomly adjust regulator screws to make the excavator “stronger.”
Increasing pressure beyond the machine specification can damage more than the pump—it can affect hoses, valves, cylinders, motors, and other components.
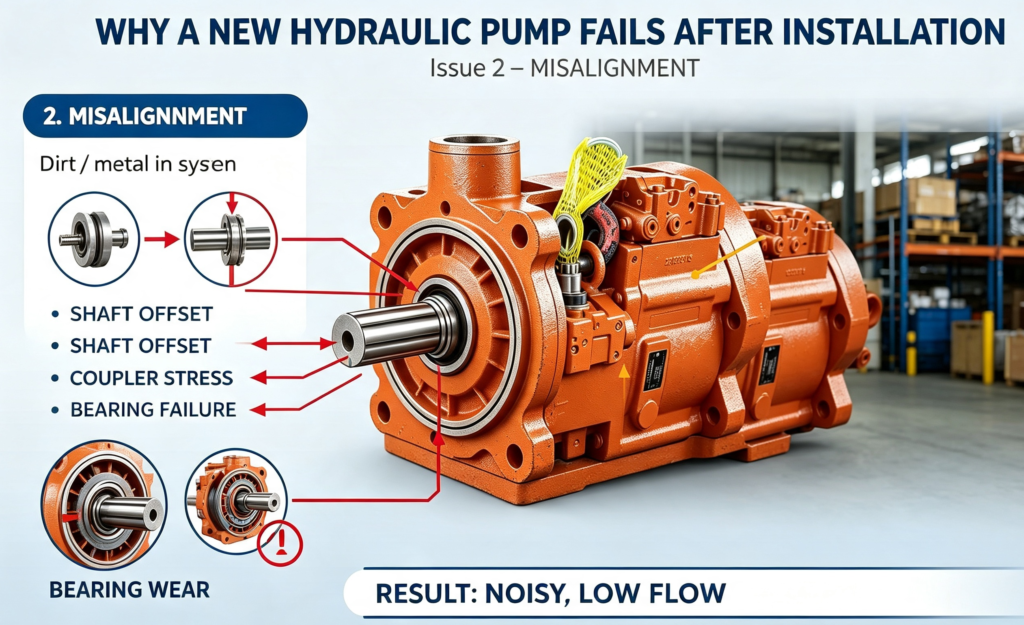
8. The Pump Drive Coupling or Alignment Is Wrong
The hydraulic pump is mechanically driven by the engine.
The connection may involve:
- Flexible coupling
- Drive hub
- Spline
- Gear
- Adapter
- Flywheel coupling
If the drive system is worn, damaged, incorrectly assembled, or misaligned, abnormal loads can be transferred to the pump shaft and bearings.
Possible symptoms
- Pump vibration
- Repeated shaft-seal leakage
- Bearing noise
- Damaged splines
- Coupling wear
- Shaft failure
Before fitting the replacement pump, inspect:
- Coupling condition
- Spline wear
- Mounting face
- Bolts
- Alignment
- Drive hub
- Engine-side connection
A new hydraulic pump should not be used to compensate for a damaged drive system.
9. The Wrong Hydraulic Oil Was Used
Hydraulic oil is not simply a fluid used to transmit pressure.
It must also:
- Lubricate pump components
- Remove heat
- Protect surfaces
- Operate within the correct viscosity range
Problems can occur when oil is:
- Too thick
- Too thin
- Contaminated
- Mixed with incompatible fluids
- Oxidized
- Overheated
- Incorrect for ambient temperature
Oil that is too thick can contribute to inlet restriction and cavitation.
Oil that is too thin can increase internal leakage and reduce lubricating-film strength.
Before installing a pump, confirm the hydraulic-oil specification required by the machine manufacturer.
Also verify:
- Correct oil level
- Correct oil condition
- Correct operating temperature
- No water contamination
- No air contamination
10. The Original Hydraulic Fault Was Never Corrected
This is perhaps the most important lesson.
The first pump may have failed because another hydraulic problem caused it to fail.
Installing a new pump without correcting that problem simply starts the failure process again.
Examples include:
Main relief valve problem
A relief valve continually operating at excessive pressure creates heat and load.
Hydraulic cooler restriction
High operating temperatures reduce oil viscosity and accelerate component wear.
Main control valve failure
Internal leakage can make the machine weak and cause technicians to wrongly blame the pump.
Travel or swing motor failure
A damaged motor can produce contamination that later enters the new pump.
Cylinder failure
Internal cylinder leakage can make the machine appear weak even when the pump is working correctly.
Engine problem
Low engine speed under load reduces pump output.
FarinParts notes that low pressure and weak machine performance may also originate from relief valves, control valves, cylinders, motors, pilot circuits, engine-speed problems, or restricted suction—not only the pump.
This is why diagnosis should come before replacement.
11. The Hydraulic Cooler or Cooling System Is Not Working Properly
A replacement pump may operate normally when cold and then deteriorate once hydraulic temperature rises.
Check:
- Oil cooler
- Cooler fins
- Cooling fan
- Fan drive
- Thermostat or bypass system
- Hydraulic oil level
- Return-line restrictions
Excessive heat can:
- Reduce oil viscosity
- Increase internal leakage
- Harden seals
- Reduce lubricant-film strength
- Accelerate oxidation
- Damage pump components
Do not treat overheating as a normal condition just because the excavator still works.
12. Dirt Entered the System During Installation
A new pump can also be contaminated during the repair itself.
Common mistakes include:
- Leaving hoses open
- Using dirty plugs
- Wiping ports with contaminated cloth
- Installing dirty fittings
- Working around grinding dust
- Filling from an unclean oil container
- Reusing contaminated hydraulic oil
- Leaving old gasket or sealing material inside ports
Hydraulic components contain very small internal clearances.
Contamination that looks harmless to the eye may be large enough to damage precision components.
Good workshop practice
Cap or plug every disconnected:
- Hose
- Tube
- Pump port
- Valve port
- Motor connection
Cleanliness should continue from disassembly through final startup.
New Hydraulic Pump Failure: Symptom and Cause Table
| Symptom After Installation | Possible Cause |
|---|---|
| Loud whining immediately | Dry startup, restricted suction |
| Pump becomes noisy when hot | Cavitation, internal damage |
| Shaft seal leaks quickly | High case pressure, misalignment |
| Machine remains weak | Wrong diagnosis, regulator problem |
| Pump overheats | Internal leakage, wrong settings, cooler issue |
| Hydraulic movement is jerky | Air in suction circuit |
| Metal appears in filter | Contamination or repeat component failure |
| Engine stalls under hydraulic load | Incorrect regulator or excessive displacement |
| Pump works briefly then fails | Contamination, lubrication failure |
| Pressure is too low | Regulator, relief valve, pump configuration |
| New pump cannot fit correctly | Wrong pump identification |
| New pump fails repeatedly | Original system problem still exists |
What to Check Before Installing a New Hydraulic Pump
Use this checklist before fitting the replacement unit.
Pump Identification
Confirm:
- Machine model
- Machine serial number
- Pump manufacturer
- Pump model
- OEM part number
- Shaft
- Flange
- Regulator
- Solenoids
- Ports
- Rotation direction
For additional identification guidance, see How to Identify the Correct Hydraulic Pump for Your Excavator.
Hydraulic System
Inspect:
- Hydraulic oil
- Tank
- Suction strainer
- Main filters
- Hoses
- Cooler
- Control valve
- Cylinders
- Swing motor
- Travel motors
- Case-drain circuit
Drive System
Check:
- Coupling
- Splines
- Adapter
- Flywheel interface
- Mounting surfaces
- Alignment
New Pump
Confirm:
- Ports are clean
- Shipping plugs are removed correctly
- Regulator matches the old unit
- Pump is primed as required
- Case drain is connected
- Fittings are properly tightened
Recommended Startup Procedure After Pump Replacement
The exact procedure must follow the equipment manufacturer’s service instructions, but a controlled startup normally includes the following steps.
Step 1: Fill the hydraulic tank
Use the correct oil and filtration method.
Step 2: Prime the pump
Fill the pump housing or inlet according to the manufacturer’s procedure.
Step 3: Confirm the case-drain line
Never start the pump with the case drain plugged.
Step 4: Check the suction circuit
Ensure valves are open and hoses are unrestricted.
Step 5: Start at low idle
Do not immediately accelerate the engine.
Step 6: Listen for abnormal noise
Stop immediately if the pump produces severe whining, grinding, or knocking.
Step 7: Cycle hydraulic functions slowly
Allow air to leave the system.
Step 8: Recheck hydraulic oil level
Actuator movement may reduce reservoir level.
Step 9: Inspect for leakage
Check:
- Shaft seal
- Pump ports
- Regulator
- Pilot pump
- Case drain
- Hose connections
Step 10: Warm the machine gradually
Bring the oil to operating temperature.
Step 11: Test pressure and flow
Compare results with machine specifications.
Step 12: Inspect the filter after initial operation
If the old pump suffered internal failure, monitor for remaining contamination.
Should You Repair the Failed New Pump or Replace It Again?
Do not automatically buy another complete pump.
First inspect the failed unit.
A repair may still be possible when:
- Housing remains reusable
- Shaft is serviceable
- Damage is limited to the rotating group
- Regulator remains repairable
- Correct repair parts are available
Possible repair parts include:
- Piston shoes
- Cylinder block
- Valve plate
- Swash plate
- Retainer plate
- Ball guide
- Drive shaft
- Bearings
- Seal kit
- Regulator components
FarinParts carries hydraulic repair kits for pump families from Rexroth, Parker, Kawasaki, Komatsu, Hitachi, Sauer, Linde and other manufacturers; its current Hydraulic Parts category lists hundreds of related items.
If rebuilding the pump, review How to Find the Right Hydraulic Repair Kit for Your Machine before ordering internal components.
Complete Pump or Repair Kit?
A complete replacement pump may be a better choice when:
- Housing is cracked
- Bearing bores are severely worn
- Drive shaft is heavily damaged
- Regulator housing is damaged
- Several major components have failed
- Repair parts are unavailable
- Professional rebuilding equipment is unavailable
- Machine downtime must be minimized
A repair kit may be suitable when the core is still serviceable and the pump can be rebuilt and tested properly.
For example, the FarinParts Hydraulic Parts catalog currently includes complete units such as the 244-8483 Main Hydraulic Pump for Caterpillar CAT 320C, 9121198 Hydraulic Main Pump for Hitachi EX100-3/EX120-3, and multiple model-specific hydraulic repair kits.
Browse the FarinParts Hydraulic Parts catalog to compare complete pumps, motors, and repair options.
FAQs
Can a brand-new hydraulic pump fail immediately?
Yes. A new pump can be damaged very quickly by dry startup, severe inlet restriction, incorrect case-drain installation, contamination, improper configuration, or excessive pressure.
Why is my new hydraulic pump whining?
Check the suction side first. Low oil level, high oil viscosity, blocked strainers, collapsed hoses, air leaks, or poor priming can cause pump starvation or cavitation.
Why is the new pump leaking from the shaft seal?
Possible causes include:
- Restricted case drain
- Excessive case pressure
- Shaft misalignment
- Damaged coupling
- Incorrect seal installation
- Excessive internal leakage
Do not assume that the shaft seal itself is the only problem.
Should I flush the system after the old pump fails?
If the previous failure released metal or other contamination, the affected hydraulic circuits should be inspected and cleaned according to the equipment manufacturer’s repair procedure before installing a replacement pump. FarinParts’ existing failure guide specifically warns against installing another pump before identifying the contamination source.
Can an incorrect regulator damage a new pump?
Yes. The wrong regulator configuration or adjustment can cause incorrect displacement, excessive load, overheating, unstable pressure, or engine overload.
Does a replacement hydraulic pump need to be primed?
Many hydraulic pumps require appropriate pre-filling or priming before startup. Always use the procedure specified for the particular pump and machine.
Why does the machine remain weak after installing a new pump?
The original problem may not have been the pump.
Possible causes include:
- Main relief valve
- Control valve
- Cylinder leakage
- Swing or travel motor leakage
- Low pilot pressure
- Engine speed
- Pump-control signal
- Suction restriction
Perform hydraulic testing before replacing another component.
How can I make sure I order the correct hydraulic pump?
Provide the complete machine model, serial number, pump model, OEM number, regulator configuration, shaft, port arrangement, and clear photos. FarinParts specifically recommends detailed pump identification rather than selecting by general machine model or appearance alone.
Prevent a Second Hydraulic Pump Failure
When a new hydraulic pump fails after installation, replacing it again without determining the cause can become extremely expensive.
Before installing another pump:
- Confirm the original diagnosis.
- Identify the exact pump configuration.
- Find the cause of the original failure.
- Remove contamination from the system.
- Inspect the suction circuit.
- Verify the case-drain line.
- Check the drive coupling and alignment.
- Use the correct hydraulic oil.
- Prime the pump correctly.
- Confirm pressure and regulator settings.
- Start at low idle.
- Test the system before returning the machine to full load.
For pump identification, troubleshooting, repair kits, and replacement components, browse FarinParts Hydraulic Parts or submit the pump information through the Parts Quote Request page. The catalog currently covers hundreds of excavator-focused hydraulic products, including complete pumps and repair kits.


